| This article needs clean up | |
| You can help the L.A. Noire wiki by by re-organizing parts of the article, checking grammar and spelling, and doing other helpful things to clean it up. |
|
Spoiler Warning |
| Plot details follow, read at your own risk. |
A Different Kind of War is an Arson case in L.A. Noire. This is the last case Cole Phelps takes on the Arson Desk, as well as the last case in L.A. Noire. This is also the only case that the player can play as protagonist Cole Phelps & Jack Kelso in a single case.
Persons of Interest[]
- Arson Suspect - Serial arsonist responsible for death and destruction of property.
- Dr. Harlan Fontaine - Clinical psychiatrist and Suburban Redevelopment Fund investor, deceased.
Objectives[]
- Identify 'Bug Sprayer' Arsonist
- Track Down 'Bug Sprayer' Arsonist
- Investigate Murder Scene
- Investigate Rancho Rincon
- Escort Jack Kelso to LA River Tunnels
- Reach LA River Tunnels
Detailed Walkthrough[]
Part I: Jack Kelso[]
In the first part of the case, you play as Jack Kelso. Jack is shown outside the Los Angeles International Speedway, preparing to investigate a number of exterminators around LA after Leland Monroe informed him that the serial arsonist was a bug-sprayer.
- Travel to Rapid Exterminators, get the Newspaper on the counter inside the store. Enter the Red Rapid Exterminator Truck parked outside while you are here for progress towards the Auto Fanatic Achievement/Trophy.
- You can choose to travel to Nuclear Bug & Rodent Control, but there are no clues to be found there. Talk to the guy behind the counter to cross the location off your list.
- Travel to Westlake Pest Control and talk to the employee behind the counter. The employee tells Kelso that a large cowboy works there and lives at a bunkhouse at the old abandoned Rancho Rincon, north of Downtown. This will trigger a cutscene and lead into the next section of the case.
Part II: Cole Phelps[]
The next section of the case takes you back to the previous day. You play as Cole Phelps again, last playable in A Walk in Elysian Fields (or Nicholson Electroplating, a DLC case). Cole and Biggs are called in by Rusty Galloway to investigate the murder of Dr. Harlan Fontaine at his home office by one of his patients, as well as the kidnapping of Elsa Lichtmann. Phelps must examine the crime scene for clues. The list of clues below is what you need to obtain in order to continue on to the next part of the case:
- On the right of the doorway you enter the crime scene through is a small table. Examine the file on top of the table, tap the small slip of paper and then turn it over, then tap the page underneath for the Fontaine's blackmail papers clue. Reading the next page is not necessary for a clue and won't provide any dialogue, but it is of interest if you are into the story.
- Examine the body of the doctor. Look at his neck for strangulation marks and his left hand for a lighter. Investigating his neck will trigger dialogue but neither of these actions provide you with clues.
- Next, in front of some cabinets near the main desk, there is a Crystal ball with blood on it.
- Now head out of the room and into the hallway you came from. View the medical cabinet and examine the Morphine inside for the Morphine cabinet clue.
- On the desk in the middle of the room, get the Newspaper. Watching the video is required to continue, although you can skip it as soon as it starts.
- Next to the Newspaper is a blank piece of paper. Shade the slip of plastic, then place the ripped newspaper page under the slip to get the final clue, Freeway route.
Cole quickly comes to the realization that Leland Monroe was building firewood houses in the path of the future freeway. The houses would be built for next to nothing, and a false, higher value would be declared by California Fire and Life, with Curtis Benson's help. The federal government will reclaim the land to commence with the freeway's construction, and the improved value will be paid to Leland Monroe and his associates. Eventually, the G.I.'s that invested in and/or bought a house would get their money back. Cole also comes to the conclusion that Fontaine had forced his patient to burn down the houses under the orders of Monroe.
Part III: Jack Kelso[]
The third section of the case has you play Jack Kelso again. Kelso checks out the bunkhouse at the old Rancho Rincon. It is located in the hills, north of Downtown, Los Angeles. Approach the house and kick one of the many doors down.
- Find a Flamethrower on a workbench to the right when entering through the front door.
- Examine the photograph of Cole's former Marine Unit on the wall (in the room with the cranes) to get the Photographs of Okinawa clue.
- In the room filled with origami cranes, find the Origami cranes clue on the workbench by inspecting a crane.
-Behind the workbench is a blue blueprint pinned against the wall.
- After examining the crane, examine the blueprints to the left of it to get the LA River Tunnels location.
Jack soon realizes that the arsonist and occupant of the bunkhouse is his and Cole's former fellow Marine, Ira Hogeboom, responsible for burning out a cave of innocent civilians during the war, under Cole's orders. He had since lost his mind and gone to Dr. Fontaine for help. Fontaine, however, working with Leland Monroe, had Ira burn down the homes in the Arson cases The Gas Man and A Walk in Elysian Fields, killing two families in the process. When Fontaine knocked out Elsa Lichtmann in his office, Hogeboom burst in and strangled the doctor. Jack, after finding the map of the Los Angeles River Tunnels, comes to the conclusion that Hogeboom resides down there with Elsa as his hostage.
Jack phones Assistant D.A. Petersen and Phelps and tells them to meet him at the Los Angeles River Tunnels entrance near 1st St. in the Warehouse District of Downtown.
Part IV: Vehicle Escort[]
After Jack tells the Assistant D.A. and Phelps to meet him at the tunnels, Cole and Biggs receive a broadcast over KGPL about a police pursuit with Patrol units pursuing Kelso. At the end of the cutscene, Phelps and Biggs are shown on Olive St. in Downtown, between The Biltmore Hotel and Pershing Square. Jack speeds by them with police in pursuit.
- Follow the car icon that is white on the mini-map. Avoid and/or eliminate the car icons that are red.
Part V: Tunnel Shootout and Finale[]
The final section of the case and game is played from the perspective of Jack Kelso. Jack, Phelps, and Biggs reach the river tunnels in the pouring rain. Petersen meets the trio there. As Cole and Jack enter the tunnels in a cutscene, the Police Chief and Detectives pull up to the scene, intending to arrest everyone there. Petersen quickly explains the situation and blackmails the Chief with the information he has, explaining that everything that's going on goes as high up as City Hall and implies that the latter might be involved. The Chief accepts Petersen's deal.
Next, the final and largest shootout of the game takes place. Take out all of the men in the tunnel system who are in pursuit of Ira, who is armed with a Flamethrower and wearing his Marine uniform.
You will eventually get to an ammunition storage room in the tunnel and be able to pick up the Flamethrower, BAR, M1 Garand, or Thompson. You may use the Flamethrower to kill at least one enemy if you haven't received the Roscoe and Friends Achievement/Trophy yet. However, Jack will pick up the flamethrower uncommanded (without the player pressing the "pick up weapon" key), and will not drop it using the "drop weapon" key. The Flamethrower turns out to be a poor weapon due to its short range, and while dying restarts the mission just before this point, quitting to the main menu throws the character back to the beginning of the car chase. This means the flamethrower cannot be dropped and almost guarantees a quick death, so players are wise to avoid it altogether.
The next step is a ladder to the right of the room with the weapons. Once Jack heads down the ladder, the water will rise. There will be two catwalks (can be seen before Jack descends) with only their railings visible. Walk on one of these catwalks in order to get to the other side; otherwise, you will drown. It is better to walk on the right one as it will be easier to avoid gunfire. After you climb another ladder the last six enemies will be waiting for you. Be very cautious in this final area; there is an area at the far end where it is possible to immediately die by falling off of the ledge.
After progressing through a small tunnel, a cutscene will start where Jack drops his Flamethrower and finds Elsa and Ira Hogeboom, clearly insane, doesn't want to hurt Elsa and realizes that Jack is his former Marine Sergeant. Cole quickly joins the three and Ira tells Cole that he was the reason that he went insane, claiming that Cole's orders for him to burn out a cave in the war - which turned out to be a civilian hospital - caused him to lose his mind. Cole helps Elsa through the rising water, claiming that he needs Ira for his case. Jack, however, disagrees, explaining Ira has suffered enough and executes him out of mercy.
Finally, Cole and Elsa reach a street grate above the rising water in the tunnel, with Jack close behind. As the torrent rises and becomes more violent, Herschel pries open the grate and hauls Elsa and Jack up with the help of Cole. Before Cole Phelps could jump up himself, however, a violent gush of water sweeps him to his death just after he utters one last word: "Goodbye".
The water shoots out of the street grates, throwing Jack, Herschel, and Elsa onto the ground. Jack stands in the mud, looking up at the rain while Elsa breaks down crying.
Case Ending[]
Later, Phelps' funeral takes place in a cutscene at Chichester Chapel. Cole's wife and two daughters are in attendance, along with previous partners and associates. Roy Earle gives a eulogy at a closed, American Flag-draped casket, with Cole's picture next to it. It is implied that Petersen insisted, in his deal with the Police Chief, that Phelps be exonerated of all previous accusations of wrongdoing. This implication is further reinforced by the handshake that Petersen gives Roy after he finishes his eulogy and the fact that the Mayor, the Chief, and Roy all got out of the situation unscathed, with Monroe and Fontaine taking the fall. When Earle denounces the accusations made against Cole with regards to his affair, Elsa yells "Swine! You belittle his memory!". Jack tells Herschel to go to her. Just before he leaves, Herschel tells Jack the latter was never Cole's friend. Jack replies with "I was never his enemy", with Herschel responding "I think he knew that, Jack".
After the credits roll, there is a final flashback showing the events just prior to the robbery of the ship containing government-issue morphine. Courtney Sheldon tells the rest of Cole's Marine Unit present that they could make a lot of money by selling morphine on the street. Most of them are jealous of Cole's success as a policeman and are bitter that they are not being recognized as heroes. Jack, opposed to the theft, eventually says that everyone already were heroes to him, and even though Phelps became famous from a fluke, they are all acknowledged by him and should recognize that themselves. He concludes saying if the others take part in the robbery, everyone will no longer be heroes to him. However, the robbery still takes place, laying the foundation for the entire plot.
Case Briefing[]
"The Doctor is dead, Benson is finished and Leland Monroe is going to limp his way into a jail cell. Safe to say the Suburban Redevelopment Fund isn't going to be around for much longer. All that's left is the guy who has Elsa, the maniac who burned the houses for Fontaine. I know he's a cowboy, I know he works pest control, but otherwise he's a nobody".
Trivia[]
- When escorting Jack Kelso through Downtown, Los Angeles to the Los Angeles River, the pursuing officers are driving Detective cars rather than Patrol cars, even though they are patrolmen and Patrol cars would normally be involved in such a pursuit.
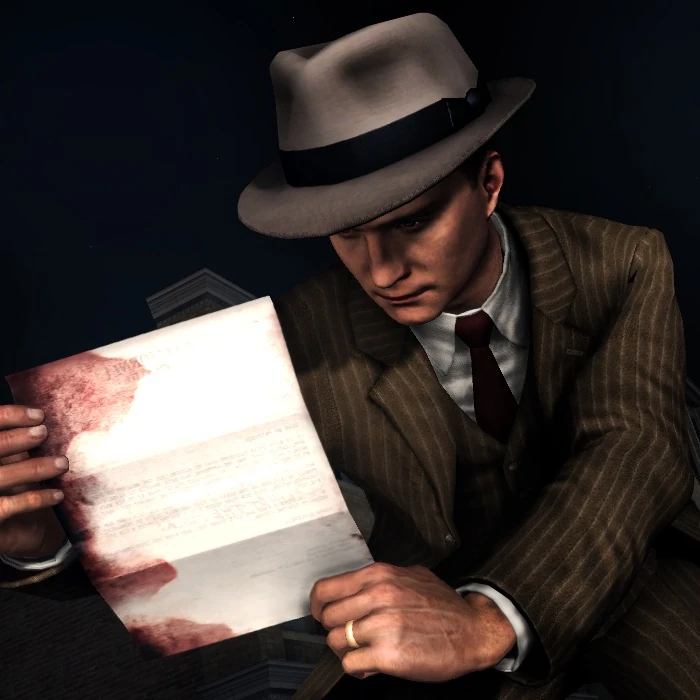
- When looking at your notebook as Jack Kelso, you can see blood dripping from your hand.
- This is the only case that allows the player to take control of both Cole Phelps and Jack Kelso.
- This is the only Arson case that has no case report or star ratings, so the player can do anything necessary to complete this case without worrying about any penalties. However, this means that you cannot gain the Public Menace Achievement/Trophy on this case.
- This and The White Shoe Slaying are the only cases (as opposed to flashbacks) which feature Military Mistakes.
- Because the final cutscene in the case is pre-rendered (one of the only pre-rendered cutscenes in the game), no matter what outfit you make Cole wear during the case he will always be wearing "The Outsider" outfit at the end.
- Cole Phelps' death is very similar to the death of Charlton Heston's character in the 1974 movie "Earthquake".
- At Cole's funeral, his casket is closed. This could be because his body was badly mangled by the violent rushing water, or his body was never recovered. However, it is most likely that that the LAPD wanted Cole's casket to be closed so they could place the American Flag over it because he was killed in the line of duty.
- Nicholson Electroplating will still be destroyed if visited in this case, regardless if the dlc is purchased or not.
- A bit of irony: The people giving Cole's eulogy are the corrupt people who Cole tried to expose and put out of power, especially Roy Earle, whom Cole never cared for due to all of his dishonest traits and illegal activities. Also, despite claiming to be his friend, Roy is the one who exposed Cole's affair to corrupt leaders and the press.
- The end credits, after the epilogue, start with Elsa singing "I Always Kill the Things I Love". Cole dies rescuing Elsa, and this may be a subtle reference to that fact. Once Elsa finishes "I Always Kill the Things I Love" she starts singing the song "Guilty", which may allude to the fact that she's feeling guilty.
- This is one of two cases that has all of Cole's detective partners present. Roy Earle gives a eulogy, Herschel Biggs sits next to Elsa, Rusty Galloway sits behind Herschel and Elsa, and Stefan Bekowsky sits nearby. The only other case where all partners are present is The Driver's Seat.
- Although in church, every man at Cole's funeral has his hat on.
- Even though they are at a funeral, Gordon Leary, Rusty Galloway and Stefan Bekowsky are not wearing black.
- Gordon Leary is the only Captain seen at Phelps´ funeral.
- This is the only case, besides all of the Patrol cases, that gives no star ratings.
- A possible Red Dead Redemption easter egg is on the wall at Rancho Rincón; a photograph of a double-action revolver.
- In the credits, under "Production Team", you can see the name "Lazlow". Lazlow's first appearance was for GTA III and he has since worked on many Rockstar games.
- This is the only case where Cole's daughters are seen.
- This is the third case to feature rain, the first being The White Shoe Slaying, and the second being The Quarter Moon Murders.
- Hogeboom can be seen in the river tunnels at one point. He has a friendly cursor, so shooting him gives you a mission failure.
- This case, the first three cases on the Patrol desk and last case on the Homicide desk are the only ones where the player doesn't conduct any interviews.
Bugs/Glitches[]
- While opening and closing the Morphine cabinet in Dr. Fontaine's Surgery , Cole Phelps can be seen sliding back and forth and interacting with the cabinet doors from a distance.
Gallery[]
")
Video Walkthroughs[]
 (8 KB)")
")
")
")
| ||||||||||||||||||||